

Whether they are embarrassing photos posted by you years ago or the million times you posted about your ex on Facebook, the thought of deleting them must have come across your mind. The good news is, you can delete all your FB posts. It all depends on what you want to delete and from which device you want to remove them.
You can either filter your post and delete them one by one, or you have the option to select a browser extension and delete multiple posts at one go.
Let us start with mobile devices.
Delete FB posts on your mobiles
The steps to be followed will depend on the operating system you use.
Android devices
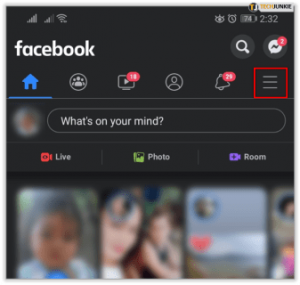
- Open the Facebook app, and select the three lines present in the right-hand corner of the screen.
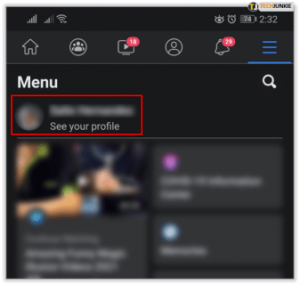
- Select your profile/tap on your name.
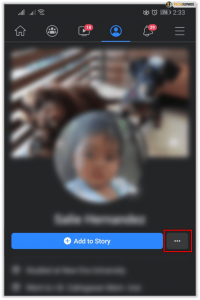
- Under your profile picture, you will notice “Add to Story.” Next to that, you will find three grey dots. Click on these three dots.
- Select “Manage Posts” from the list.

- You will notice “Filters” in the top left corner. Tap on this.
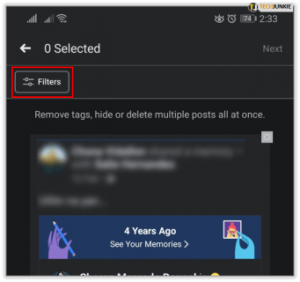
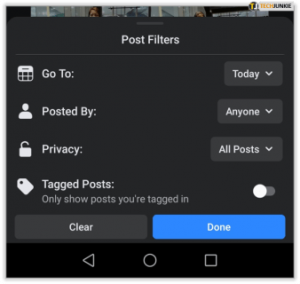
- To filter your posts, click on the date, posted by, and other available options.
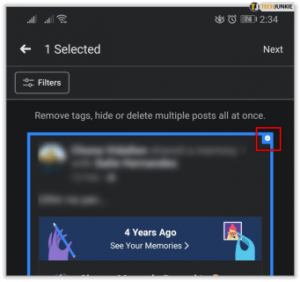
- Each post will have a bubble on the right side. Click on that.
- You will now see a trash can on the bottom of the screen.
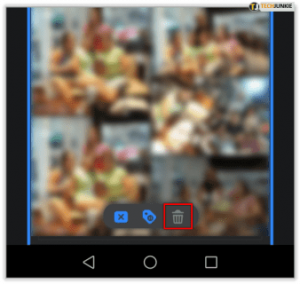
- Confirm to delete the FB post.
iPhone or iPad
- Open Facebook application and tap on the three lines in the left-hand corner of the app.
- Tap on your name present at the top.
- Next to the “Add to Story” option, you will notice three grey dots. Click on this.
- Click “Activity Log” from the list.
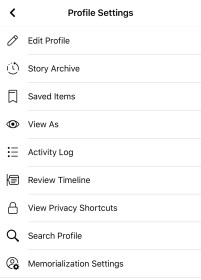
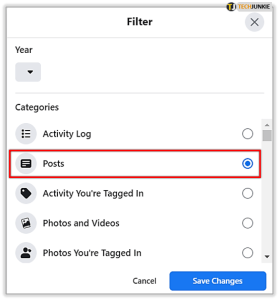
- In the top right-hand corner, you will have an option to filter your posts by Year and Category. Pick the Category and filter to “Posts.”
- As soon as the filtered options appear, click on the three dots next to the post you want to remove.
- Tap “Delete” and then confirm.
Point to remember
Facebook gives you the option to edit your privacy or hide posts from your timeline as well. While deleting is a permanent option, hiding posts from your timeline or editing privacy will ensure others (apart from you) cannot view them. If you seek a more temporary solution, you can consider changing the privacy policy or hiding the posts instead of deleting them.
Delete FB posts in bulk from the browser
If you want to delete all your FB posts, a web browser and an extension may be of help to you. Depending on your requirement, you could also consider deleting your existing account and creating a new one in its place.
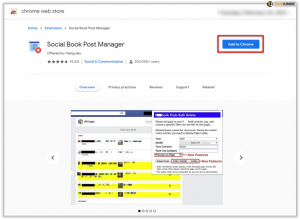
Here, we will talk about the Social Book Post Manager extension extension. This one makes the deletion/removal process smooth and quicker and is a boon for those who want to delete years’ worth of posts.
Social Book Post Manager extension
You do not want to miss taking a backup before you start deleting your FB posts, as they’d be gone forever. You can recover the items in the future (if required) by following the below steps to create a backup:
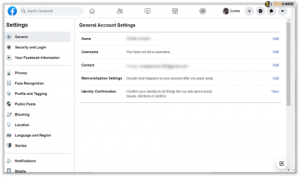
- Click on the “Account Settings” screen.
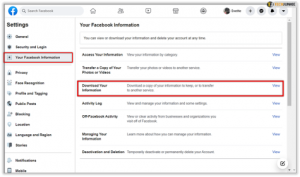
- Select the “Your Facebook Information” on the left, and click on “Download Your Information.”
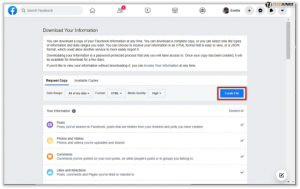
- Tap on “Create File” and follow the prompts. FB will start creating a backup of all the data you have, and it will be available for download once completed. You will receive a notification of the download completion and availability via email.
Once the data backup is complete-
- Install the extension called Social Book Post Manager.
- Go to Facebook, and click on the Activity Log.
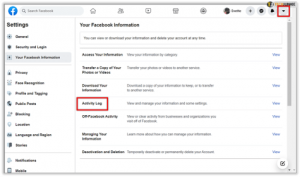
- The Activity Log is the page that displays all your activities on Facebook. You can view all the added friends, all the comments and posts that you have liked and created. On the left-hand side, you will notice the Filter section. Select the filter that you want to delete. For example, in this case, click on “Posts.”
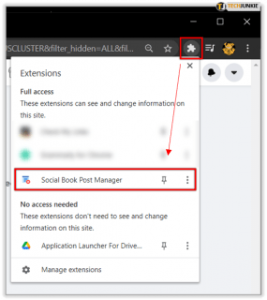
- Now click on the icon at the top-right of your Chrome browser to open the Social Book Post Manager extension.
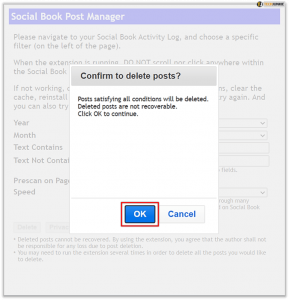
- Once the extension has been opened, you will see a list of filters that you can use to remove or delete posts on FB. The posts that should be removed will be determined by the filters you choose, and you have the option to filter them by particular months, years, and even strings. If you want to, you can use the “Prescan on Page” option as well. It will cause the extension to prompt you to confirm which posts will be removed.
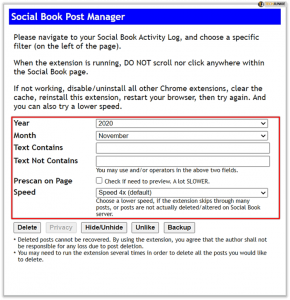
- Once you’ve selected all the posts to be deleted, click on “OK” to close the alert. Once satisfied with the selection, click on confirm. If you want to relook at the selection, refresh the page.